Skip to main content  
  Helping the environment one joke at a time, Grinning Planet. Click to go to home page. flying letter; click to go to signup page for free email version
Get GP free
via email !


Wall Shade Trellis Plan –
Save Energy, Lower Air Conditioning Bill

This shade trellis plan for walls can reduce your house's heat load from the sun, save energy, and save money on your air conditioning bill.

WHO KNOWS WHAT SAVINGS LURK IN THE HEARTS OF SHADOWS?
A Wall Shade Trellis Can Save Energy and Lower Air Conditioning Bills

"Who knows what evil lurks in the hearts of men?" -- "The Shadow does" ... And so went the opening of the old radio drama, The Shadow. Fictional characters applying their energy to stopping troublesome bad guys is fine, but we're more interested today in how to apply real shadows to your home to stop troublesome solar loading. Our shade trellis plan for walls is easy to build and install, and it can reduce your house's heat load from the sun. You'll save energy and save money on your air conditioning bill.

picture showing trellis system installed in gable end

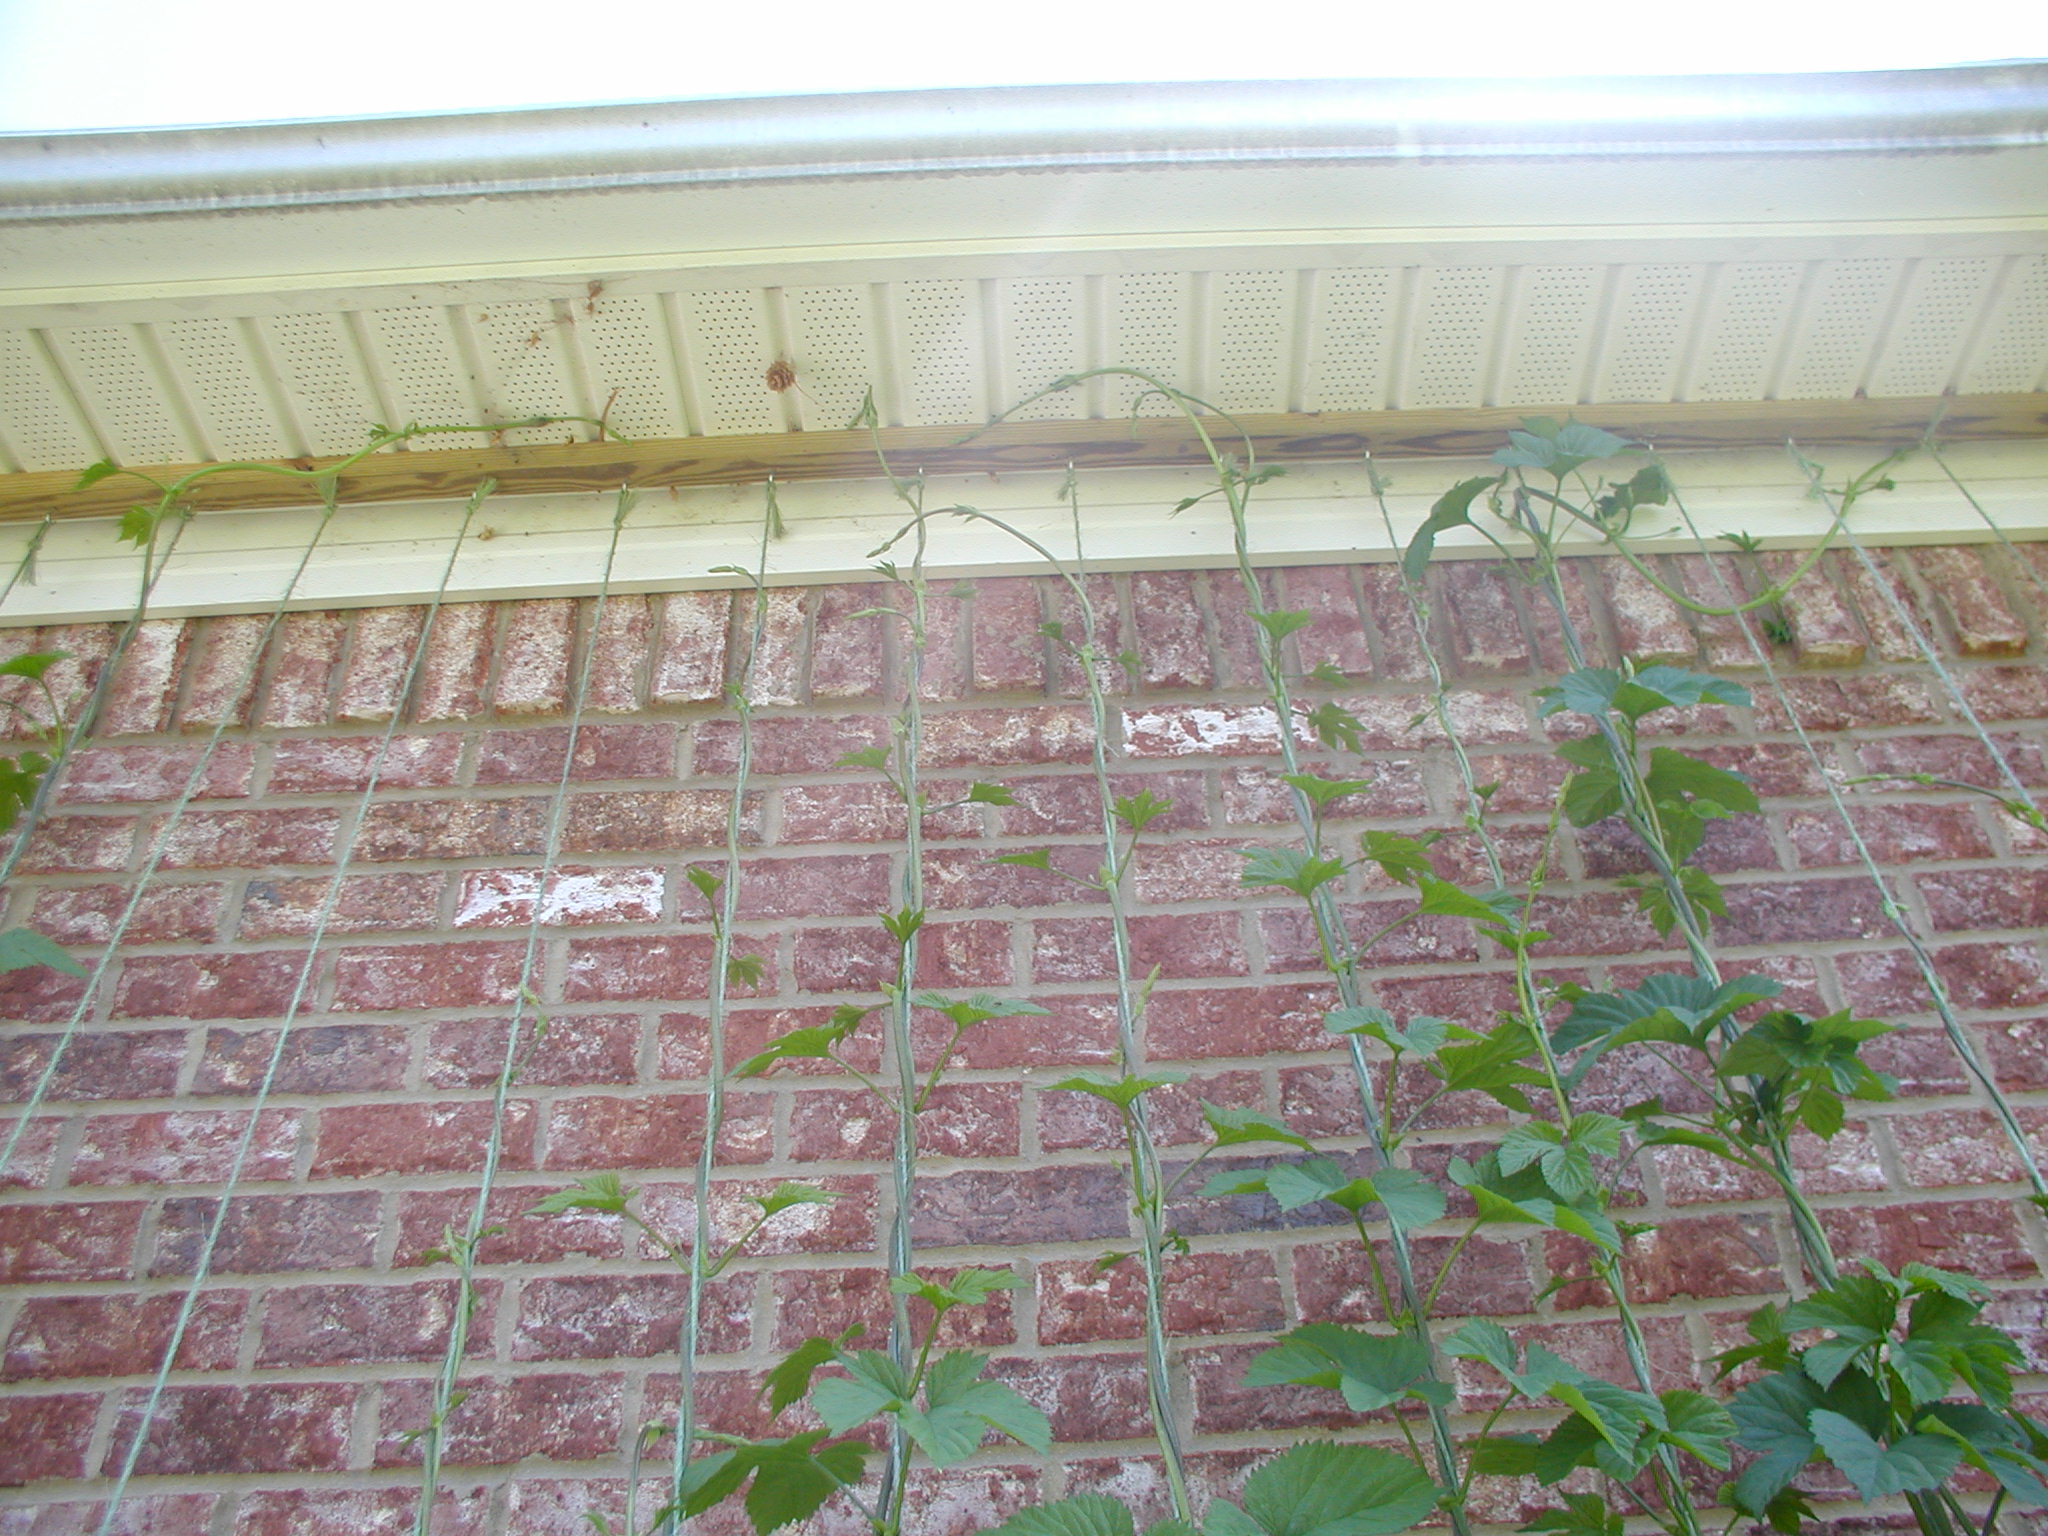
Springtime photo of wall shade trellis. Once the vines are grown, they will
shade the wall and reduce the cooling load on the area inside the home.
NOTE: Click pic to enlarge to full screen.

BACKGROUND

One of the best ways to reduce air conditioning costs is to keep the summer sun from adding heat load to the exterior surfaces of your home. Even with a well insulated home, the heat from the exterior surfaces transfers slowly through the walls to the interior surfaces and then into the air in your home, causing your A/C unit to work harder.

WANT TO PRINT IT?

This article is also available in PDF format.

Having shade trees near the house is a classic way of getting shade from the summer sun. But if you don't already have shade trees that are effective for this purpose and don't want to wait a couple of decades for newly planted trees to get big enough to make a difference—and if you can't afford a high-tech house umbrella (yes, that's a joke)—we have a simple way to shade your home's walls using a trellis system. Air conditioning bills will go down as the vines on the trellis go up!

Below we offer step-by-step how-to plans/instructions for putting up your wall shade trellis. You or your helper will need to have basic carpentry skills—nothing fancy, but you must be able to saw boards, drill holes, and drive in screws.

STEP 1 — PLAN IT

You need to have studied the pattern of how the summer sun strikes your house. In the northern hemisphere, the east and west walls are usually the problem—especially the west wall, which gets hit with the late afternoon sun. The south wall can also be a problem in the still-hot months of August and September as the path of the sun gets lower in the sky. In June and July, the summer sun is still so high in the sky that little sunlight strikes the southern wall.

Many houses, of course, aren't oriented to a perfect E-W-N-S alignment. Don't worry—whatever your house's alignment, just figure out which walls are getting the most sun over the hottest months.

You'll also need to decide whether you're willing to have the trellis block some of the light that would otherwise come in your windows. Doing so maximizes the shading benefit of the trellis—letting sun stream in the windows while you're running the A/C is counterproductive. Even if you have window shades or drapes on the inside of the windows, just having the sun strike the exterior surface of the window adds heat to the house. Having the trellis in front of the windows as well as the walls mostly shades the window but still allows dappled sunlight in. But if you're not ready to go that far, you'll need to plan a gap in your trellis structure.

STEP 2 — PREP THE GARDEN BED

Whatever tilling or soil amendment you want to do for the plants that will grow up the trellis should be done before you install the trellis.

STEP 3 — GET PARTS, ORGANIZE TOOLS

Once you've figured out what sections of which walls you want to add trellis structures to, measure the lateral distances the trellises are to cover. For each four feet of lateral distance, you'll need:

  • 4 feet worth of 2x4s (treated pine, cedar, black locust, redwood, or other rot-resistant wood)
  • an additional 1 or 2 feet worth of 2x4s, to be turned into stakes
  • 8 screw eyes
  • 8 screw hooks
  • 3-1/2" exterior screws (to screw the boards to the eaves and the stakes)

So, for instance, if you want to cover 12 feet of wall, you'll need one 12-foot 2x4 (which you will rip in half to make two 2x2s—one for the top, under the eaves, and one for the bottom, staked in the ground). You'd also need an additional two feet worth of 2x4s (which would be ripped in half, cross-cut at 1-foot lengths, and sharpened, giving you four stakes with which to install the bottom board.

RIPPING LUMBER

To rip 2x4s in half, your best bet is a table saw or a radial arm saw. If you don't have one (and don't know a friend or neighbor who does), the place you buy your lumber may be able to cut your 2x4s into 2x2s. Some lumber stores may even sell 2x2s pre-cut.

You'll also need a quantity of baler twine or some type of rough, tough, fat twine that's designed for outside applications. Any farm supply store will have baler twine.

The screw eyes and hooks should be "not too big" and "not too small"—big enough to get a few loops of twine through but not so big that you're wasting money. They must be zinc-plated, stainless steel, or galvanized so they will stand up to the outdoor conditions. (What we bought: Alambre Wire Goods - Screw Hook, Zinc, 10 x 2-1/16; Alambre Wire Goods - Screw Eye, Zinc, 208 x 1-3/8.)

Tools to have handy:

  • a 25' ruler
  • a small sledge hammer (to pound the stakes in)
  • a drill
  • drill bits sized for the shank of screw eyes and hooks
  • a drill bit sized for 3-1/2" exterior screws
  • a screw bit to match the head of the 3-1/2" exterior screws (i.e. Phillips, star, square)
  • a couple of ladders tall enough to let you work under the eaves

STEP 4 — CUT WOOD, ADD SCREW EYES AND HOOKS

All 2x4s need to be ripped in half, to 2x2s. For the 2x2s that will be stakes, also cut them into 1-foot lengths and add points.

Starting 3 inches from the end of one of the trellis boards, start adding screw eyes every six inches. Once you're done turning each screw eye, its axis should be perpendicular to the axis of the board. Using the same pattern, add the screw hooks to the other trellis board. (Tip: You can use a screw hook as a bit in your (variable-speed) drill to drive in the eyes; similarly, use a screw eye in the drill to drive in the hooks.)

THE MISSING HALF-INCH

Remember, finished 2x4s are only 1-1/2 x 3-1/2, so when ripped in half, your "2x2s" will really only be about 1-1/2" x 1-3/4".

IMPORTANT: Pre-drill all holes in the trellis boards, whether they are for the screw eyes/hooks or the 3-1/2" screws. Same goes for the stakes. This will help keep the lumber from splitting.

Using 3-1/2" exterior screws, affix the trellis board that has the hooks under the eaves, a few inches from the wall. (If you don't have picture of trellis board with hooks installed under roof overhang an overhang, you'll need to figure out some other method of attachment near/below the gutter. (Do not drill holes in your gutter!) Make sure you're catching something solid with the screws (every 16"-24"). The open part of the hooks should be facing out.

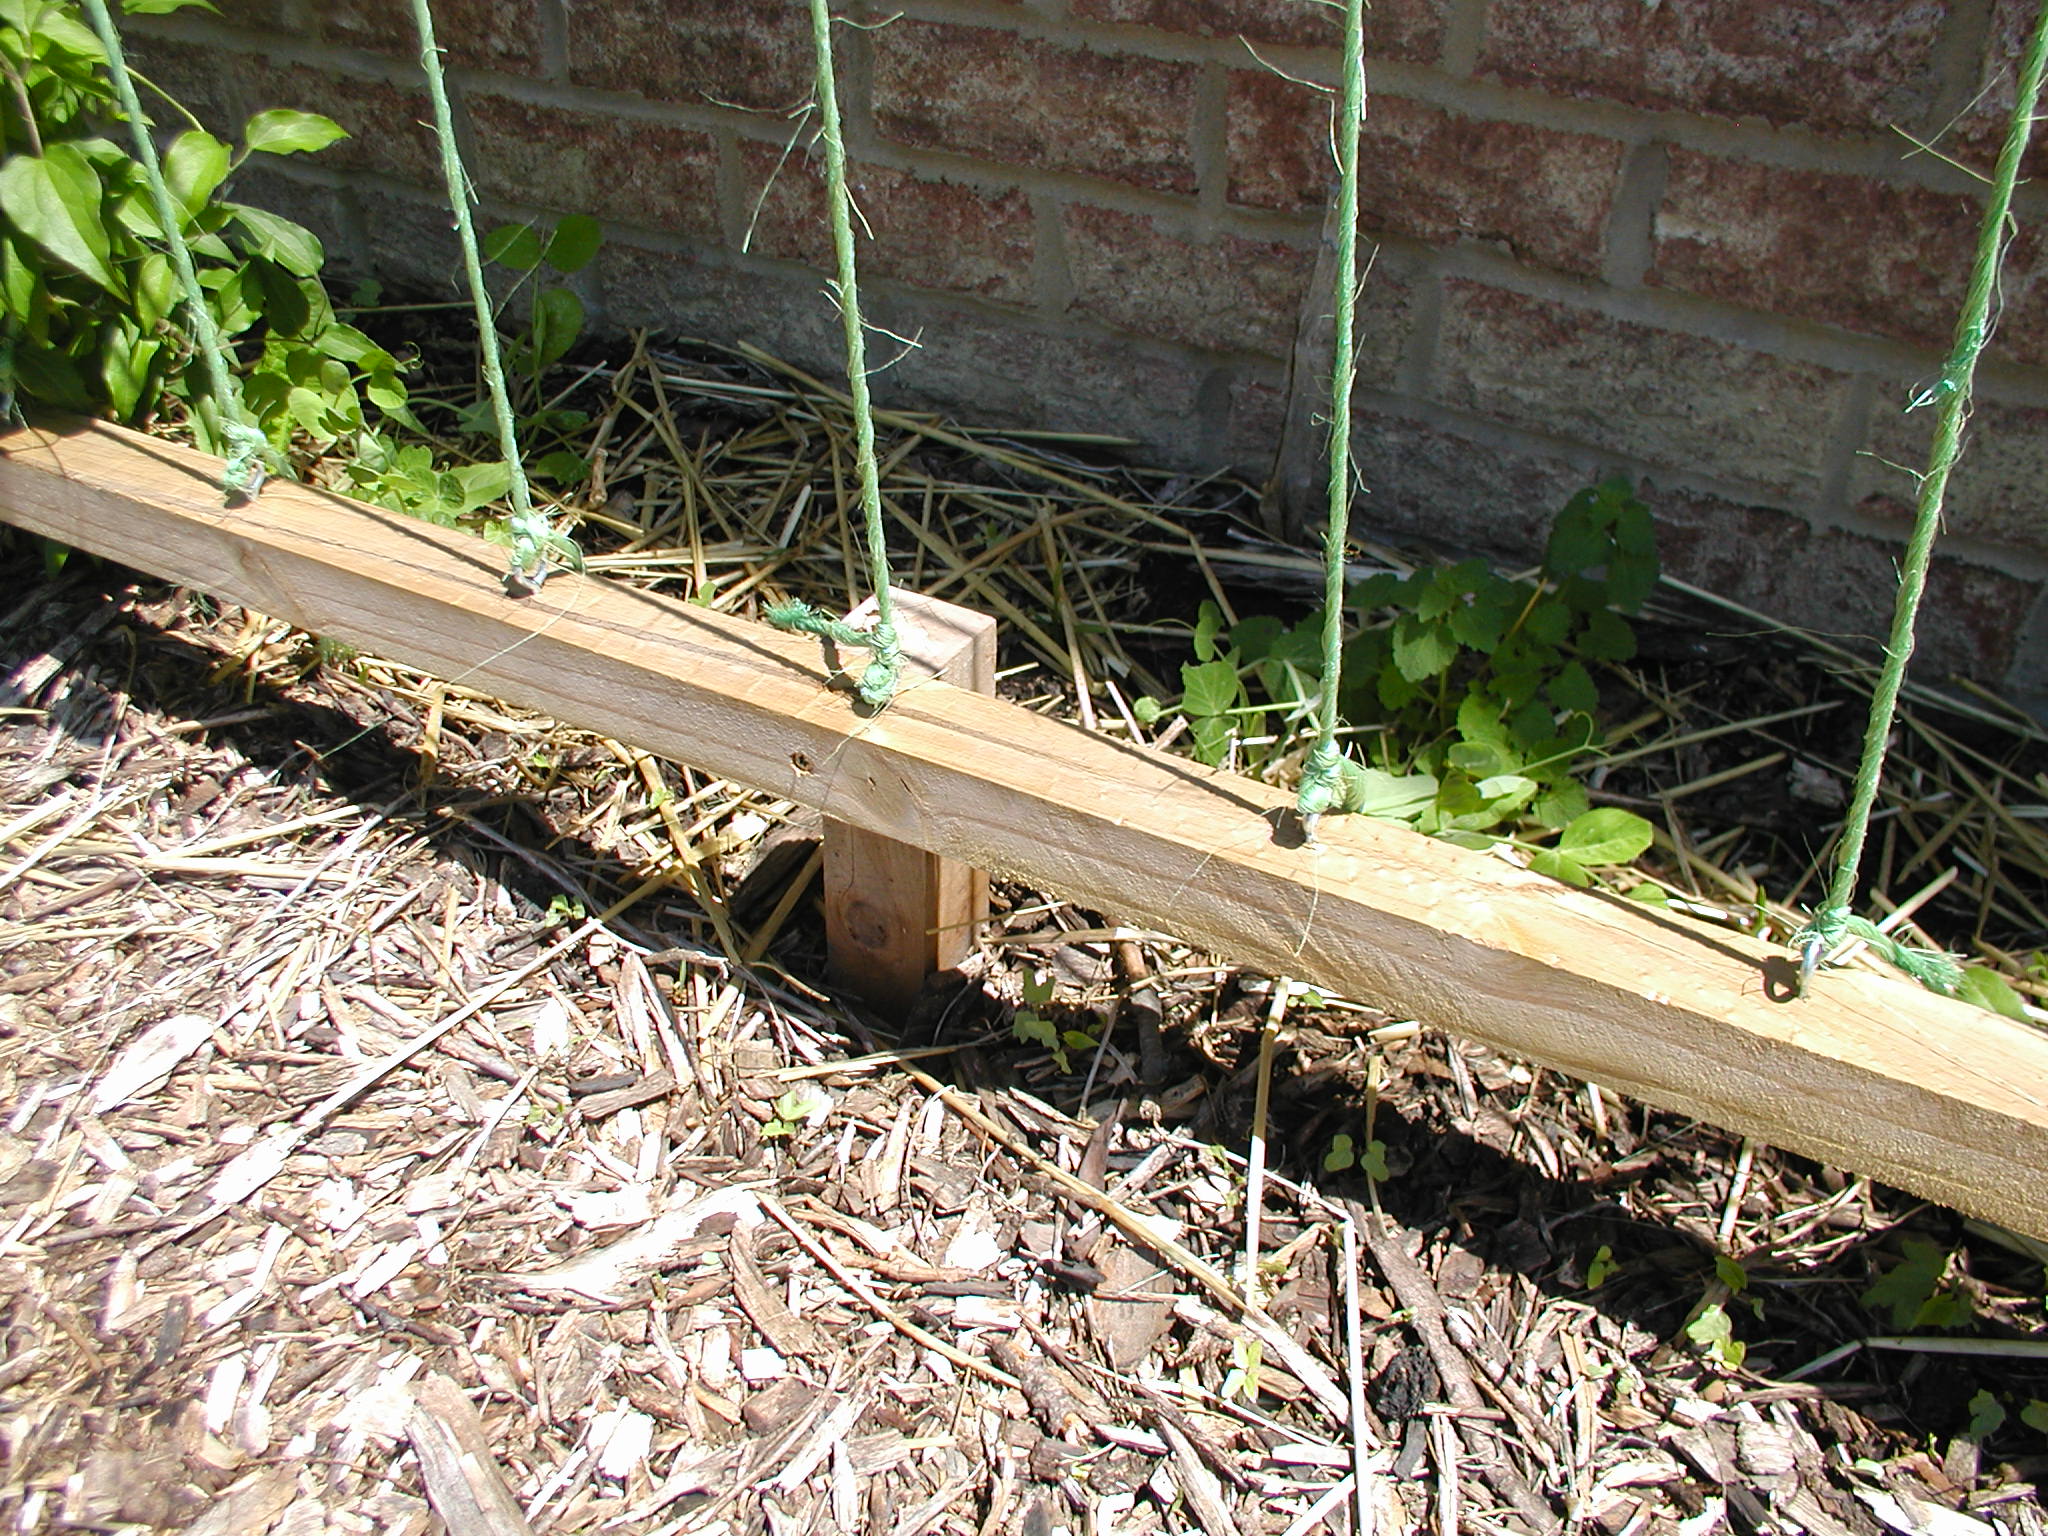
Using the stakes, install the bottom board. Put in the two end stakes first, screw the trellis board to them, and then install the interior stakes. The normal stake spacing is 4 feet.

You can install the bottom trellis board a few inches from the wall (to match what you did with the top board), which will give you a perfectly vertical trellis, with the base of the plants in front of the trellis. Or you can install the bottom board 1-2 feet from the wall, in which case there would be a slight tilt to the trellis, with the base of the plants behind the board. This is an aesthetic choice.

picture of base trellis board with stakes, screw eyes, and twine It's also your choice whether you want the board...

  • to be perfectly level (which makes sense if your terrain is very near level); or
  • to follow the slope of the terrain.

There will be cases where one board is horizontal and the other is on a slope; for instance:

  • the bottom board slopes (as it follows the sloping terrain) and the top board is under a flat eaves; or
  • the bottom board is level on the ground but the top board follows the slope of the roof in a gable end.

If you have a math wiz in the house, trigonometry can be used to figure the length of sloped board that matches its non-sloped mate. Or you can use a plumb bob and make empirical measurements to figure it out.

In such cases, you may choose to adjust the spacing pattern of the screw eyes and hooks on the sloped board so the spacing relative to vertical remains at six inches. Not doing do so can provide an interesting fan effect in a gable-end installation, but for other installations, you probably want all the strings to be true vertical. Whatever you decide, you should have the same number of screw hooks in the top board as the number of screw eyes in the bottom board.

STEP 5 — ADD STRINGS

For each screw eye/hook pair:

  • Make a good knot on the end of the baler twine and put it on the hook. If there is any slip to the knot, cinch it tight to the hook.
  • At the bottom, cut the twine off about a foot past the screw eye. Slip the twine through the screw eye and pull it tight. Do this a couple more times—the loops running through the eye add friction and help hold things tight.
  • Use a good knot to tie the string at the eye.
  • If there is an excess twine "tail" longer than a few inches, trim it.

When installing the twine, it usually works best to start from one end and work towards the other.

STEP 6 — PLANT SELECTION

The best shade vines will be those that grow aggressively. This also means that over the years you will have to keep them from escaping to other areas. Try to choose native perennial vines that have lush vegetation during the growing season but lose their leaves or die back to the ground during winter. You want the winter sun to strike your house, both to help warm it and to suppress growth of mold and algae.

Also choose a vine that has some aesthetic appeal (i.e. some flowers at some point in the growing season). We like hops—our chosen variety covers the wall in a mere six weeks after the first shoots pop up in spring. We also have clematis, which is a pretty vine, but it does not shade quite as well as the hops.

Whatever you choose, just keep in mind the balance between shade potential, aesthetics, and care issues. And avoid English Ivy or other plants that are notorious for damaging brick and siding.

STEP 7 — PLANT 'EM

Make sure young plants get enough water, and as they start getting big enough, help them find the trellis strings.

STEP 8 — SEASONAL MAINTENANCE

Once the vines die back in the late fall, it's time to take the dead plant material down. If you want, you can also take the twine down and store it. This will extend the life of the twine a little, but the process is tedious. We leave our strings up over the winter—without the vines, the twine isn't that noticeable from a distance.

WANT TO PRINT IT?

This article is also available in PDF format.

In the spring, whether you've left the twine up over the winter or are reinstalling twine you removed the previous fall, give each string a good tug to make sure it's still strong enough to be used this growing season.

Know someone who might like this Wall Shade Trellis Plan article? Please forward it to them.

Publish date: 01-MAY-2010

Books:

  • See books related to
    Wall Shade Trellis Plan - Save Energy, Lower Air Conditioning Bill

More articles and resources on....

Get Grinning Planet free
via email once a month

ABOUT AMAZON LINKS:
Shopping at Amazon via the links on this and other pages on Grinning Planet helps support our effort to inform the world about resilience and sustainable solutions. Thanks!

Search Amazon.com ....


GP ARTICLES RELATED TO
Wall Shade Trellis Plan - Save Energy, Lower Air Conditioning Bill
 

BE A SUNSHINE SUPERMAN (OR WOMAN)—POWER YOUR HOME WITH SOLAR!

Systems and Strategies — Home Solar Energy?

FIRE JUSTIN TIME, HIRE JUSTIN CASE

Avoid Problems and Save Money with The Resilient Household

“WORKING WITH NATURE” vs. “DEATH BY A THOUSAND CHEMICALS”

Good Organic Gardening Tips for Vegetables, Lawns, and Flowers


FREE AUDIO CLIPS

free audio news clips link; image of zombie kid - DON'T BE A MAINSTREAM MEDIA DRONE! - Free MP3 news download at Grinning Planet
 
Books for a Better Planet

For more reviews or purchase info, click on any title to go to Amazon.com

  book cover for Solar Living Sourcebook--12th Edition, by John Schaeffer (Editor), 9/1/2007

Complete Guide to Renewable Energy Technologies and Sustainable Living

Do you want to harvest sunlight, wind, or falling water to power your home? Or sell that renewable energy back to your utility company? Are you looking to build your dream eco-home? Or to convert to biodiesel and minimize your fossil fuel use? This fully updated classic of sustainable living technology tells how and gives you access to the world's most extensive selection of hardware to make it all happen. (John Schaeffer)

 
  book cover for Storey's Basic Country Skills, by John and Martha Storey, 9/1/1999

A Practical Guide to Self-Reliance   (by John and Martha Storey)

This is the book for anyone who wants to become more self-reliant, from suburbanites with 1/4 of an acre to country homesteaders with several. The information is easily understood and readily applicable. More than 150 of Storey's expert authors in gardening, building, animal raising, and homesteading share their specialized knowledge and experience in this ultimate guide to living a more independent, satisfying life.  "This book is a great guide to self-reliance in the country." – GP

 
  book cover for Permaculture, by David Holmgren, 12/1/2002

Principles and Pathways Beyond Sustainability

In Permaculture, David Holmgren brings into sharper focus the powerful and still evolving concept he pioneered with Bill Mollison in the 1970s. The book integrates 25 years of thinking and teaching to reveal a new understanding permaculture, drawing a correlation between every aspect of how we organize our lives, communities, and landscapes and our ability to creatively adapt to the ecological realities that shape human destiny. Permaculture provides refreshing perspectives on a range of environmental issues and shows how permaculture is much more than just a system of gardening—it's essential to understanding the foundations of sustainable design and culture.


Related book pages on Grinning Planet:

PURCHASES OF BOOKS (OR ANYTHING!) FROM AMAZON LINKS AND SEARCH BOXES ON GRINNING PLANET HELP SUPPORT THIS FREE SITE. THANKS!

Or search Amazon.com for more...


Back to . . .

Ancient Egyptian Cartoon

Environmental Cartoons

Jokes/Cartoons (non-eco)


ADVERTISEMENT


Hey, we don't pick
the Google ads!   – GP

 
CLICKS ON OUR ADS AND PURCHASES VIA OUR AMAZON LINKS HELP SUPPORT THIS FREE SITE... THANKS!


Turn a child's love of animals into a love of reading with Zoobooks magazine, a magazine for kids; sign up now and receive FREE Elephants Zoobook and Tiger Poster; opens in new window

       
   >              
   > document gif Sign up to get Grinning Planet free by email, or get more info about it Email a link to this page to someone  
   > Issue Number 215
Copyright 2010 © Mark Jeantheau — All rights reserved.   More info


NEWS, ARTICLES, INFO

MP3 News Download
Video/Audio News Sites
Environmental News Sites
Investigative Journalism Sites

Environment/Energy/Economy
    - Articles/Resources By Topic
    - Articles By Date

Environmental Quotes
    - Funny Environmental Quotes
    - Peak Oil Quotes

Environmental Cartoons/Jokes
    - Environmental Videos/Animations

Environmental Products
Eco/Nature Greeting Cards

Grinning Planet Farm

FUNNY STUFF

Funny Jokes/Cartoons
    - Environmental Cartoons

Funny Animations/Videos
    - Environmental Animations/Videos

Funny Quotes
    - Environmental Funny Quotes

BOOKS

Environmental Books
Global Warming Books
Energy Books
Solar Energy Books
Peak Oil Books
Food-Gardening Books
Media Books

 
MUSIC & MOVIES

Environmental Movies
Environmental Songs
Environmental Music Videos

Album Reviews
Fun With Lyrics

ADMIN

Home Page
Search
Site Map
About Us
FAQs
Contact
Free Subscriptions
Unsubscribe
Privacy Policy